
The Castle Bathed in Moonlight
Lacrima Castle (Black Demon Castle ラクイマ - Rakuima) is the second stage of Riviera: The Promised Land. It was once inhabited by demons, but since Ragnarok, it was looked after by the Arcs. Ein, Lina, and Fia came here to investigate the Arcs' sudden disappearance without the Elder's consent. The Castle is perpetually bathed in the light of the full moon. Entering this stage marks the beginning of Chapter 2 - Pursuit of Truth.
Wilhelm Bluff
"A cliff on the eastern land of Riviera. Migrating birds enjoy the warm weather there."
In the first area, medicinal herbs can be found in the Wet Grass; it is said that Wilhelm Bluff is renowned for its herbs. Afterwards, the Chipped Dagger will appear and Lina will give it to Ein if he praises her for spotting it. Both events require TP (Trigger Points).

Demon Shrub
In the second area, a single Triffid is encountered. S Ranking it will reward you with a Rose Whip; this is easily done by simply using Ein's Overskill Lightning Call with Naga's Fang. After the battle, inspect the grass in Look Mode to find a rock. It has a use later, though depending on your preferences, it's either good or bad.
In the third area, if Ein checks the Briars, Ein and Lina's MAX HP will be decreased by 5%, because the Briars have thorns. Don't waste a Trigger Point on this event.
Shadow Bridge
"A stone bridge leading to the castle. The moonlight creates a mysterious shadow on a water."
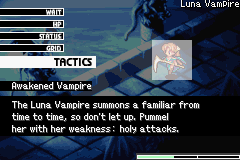
Awakened Vampire
In the first area, the Fia felt an evil presence within the castle Fia also sensed that someone's watching the party. If Ein checks the gargoyle statue, Ein and Lina will say that the statue is eerie. If checked once more, a Luna Vampire will appear. This is potentially the first time the player gets to decide the formation for battle.
In the second area, if Ein checks the Gargoyle statue, there is nothing in it. Lina hoped that there was something in it. If Ein says that he wanted the same thing, Lina will hit the Gargoyle statue and the statue will shoot at the party, triggering a quicktime minigame.There is also a booby-trapped chest containing a Longbow or Rapier.


Gatekeepers
There is a demon encounter in the third area consisting of an Evil Mage and a Gladiator, both of whom are The Gatekeepers. This battle can be fairly difficult since, at this point, your party is still bare bones and lacking in experience. Also, if the Evil Mage lasts long enough (roughly 5-7 turns), he will summon a Skull Fencer, which will only make the battle much worse. Take advantage of positioning and the targetting system to prioritize the Mage; beware of the enemy Break Outs, as they are heavy damage dealers. A form of healing is highly recommended. After the battle, the party can advance into the Castle. Don't waste a Trigger Point on the gargoyle statue in this area.
Moonlit Garden
"In the castle's courtyard, stone pillars and small shrubs line a garden path."

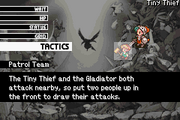
Patrol Team
Upon entry, the team will have to hide from a patrol squad that was headed toward them. If the player messes up the minigame, Lina will trip trying to get away, resulting in the party having to fight them instead of hiding. After defeating the demons, move forward into the second area.
In this room, the group runs into a lone Viper Rachet. During this encounter, Fia will introduce the Position Change feature. Though the battle itself


Wandering Beast
is fairly tame, after the fight, the girls will be relieved that there was only one. Fia will suggest that in order to move forward, they must hone their skills. This is where the Practice feature is introduced, and it is the game's grinding method; it is available henceforth. There is also an optional blue chest, though it is not booby-trapped. This room forks to the right, or forward.
If you choose the right path, you'll be taken to a dead end. If you inspect the tree, Lina will spot a fruit, and she will want Ein to get it for her. If you choose yes, you will have to shake the tree back-and-forth. If successful, you then have to choose who gets to eat it, or simply keep it, though not giving it to Lina will sadden her. For the best results, let Lina have it; it will please her and she'll get a permanent HP increase. Plus they can be found in the Grove of Repose once this stage is completed. TP is needed, as usual.
Moving forward is the way to progress. In the fourth room, there are a couple of hidden demons in the


Bush Slackers
nearby bush, but you have to spot them in Look Mode in order to avoid the fight; trying to move forward will make them detect and attack you. If you do examine the bushes you will have more options:
- Eavesdrop - If you pick this one, the team will devise a plan to use one of the girls (player's choice) as a decoy while the others attempt a sneak attack with the nearby chest. Who you pick doesn't matter, as if you succeed, both of them will be pleased. Failure results in a physical encounter.
- Sneak past - You can attempt to sneak past them, but they will remain there on subsequent visits. If you fail, you have to battle.
- Ignore - Worst option, as Ein will decide not to do anything, and you will be attacked anyway if you try to move on.
Once this is over with, the player can go into the next area of the Castle. If the chest remains, you can collect the item within it. You will likely revisit the Moonlit Garden multiple times.
Sentry Tower
"A tower located in a corner of the Moonlit Garden. The spiral stairs lead to the top."
Once you enter Sentry Tower, there will be a stack of bones that can be examined wih TP. From there, you'll


Rampant Soul
have options on what to do with it.
- Leave it to Fia - The best option; Fia will pray for the soul of the corpse, and if successful, you'll get the best result, and the corpse will disappear; Fia will lose 5% of her HP. If unsuccessful, the corpse will still disappear, Fia will still lose HP, and 2,000 points will still be rewarded, so it makes little difference.
- Leave it to Lina - If you select this one, Lina will cluelessly attack the body, provoking the lost soul to attack the party. Bring Einherjar if you plan on survivng this demon. Also note that the S.Nightmare will have Max Rage automatically.


Lawless Beings
- Nothing - If you're going to pick this, you may as well not use the TP to activate this event to begin with. Ignoring the body will cause a Skull Fencer to attack them next time they pass by this area, angered that they left him there.

Jet Black Wind

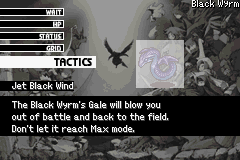
Upon proceeding to the next room, a black wyrm will be guarding the path. Its Break Out! will blow away the party; the first encounter with it is an inevitable blow-away, so don't try to avoid it.
When you get blown away, Ein and one of the girls will end up on Connecting Bridge. Which girl it is depends on the affection; the one with more affection will be separated from the party. The two will be ambushed by Shadow Dwellers.


Shadow Dwellers
After the fight, you can bond with the girl some more at the cost of TP, and or Drop Down back to Moonlit Garden, where the group will be reunited.
Make your way back to Sentry Tower and confront the Jet Black Wind again; the damage sustained in previous battles always carries over. This time, it is possible to defeat it and not get blown away again, but if you allow yourself to get blown away once more, you'll be able to get a Key Item that will allow you to get more great items later on, so it is a good idea to get blown away on purpose again. It is up to you, so if you want to simply beat it and move on, you can and it will save a lot of turns.
For those who got blown away again (willingly or otherwise), the group will remain together, but land on the tree in Moonlit Garden. A branch will fall on Lina's head, reducing her HP by 5%. Collect the Mosamo branch (TP), and it can be used later as a torch.
After getting past the wyrm, you will finally reach the third segment of Sentry Tower. In the third and final room, there will be a flying bat. If you activate this event in Look Mode, Line will want Ein to catch it for her. Once again, you have the options:


Lost Bat of Lacrima
- Catch it - If successful, you will please Lina and obtain the Mr. Bat battle item. If not, it will attack out of rage.
- Throw a Rock - Remember the rock you picked up at Wilhelm Bluff? If you choose to, it gets its use here and now. Successfully hitting the bat will earn you the bat wings key item which can be traded to NoNo in Crystal Cavern. Whether you hit or not, Lina will not be unhappy about it. Miss, and it flies away.
- Ignore it - Waste of turn and TP.
Whichever outcome you get is entirely up to you. If you really want the bat wings, select the second one and hope you don't miss. If you'd rather get Mr. Bat, then don't mess up, or else you'll get into another battle instead. Just don't waste your time by ignoring it. There isn't anything else in this room, so move on when you're done.
Connecting Bridge
"A walkway high above the ground which connects two towers. It was reserved for emergency use only."


Runt Squad
The only thing in the first room is a blue chest. It contains: Longbow, Rapier, Iron Sword, and Coral Staff. Moving along to the next room, you'll be attacked by a bunch of runts; Fia will explain that the longer the bar is under ATTACK, the greater the damage will be. After the fight, a chest will appear. Suspicious? In order to proceed, you must use Look Mode to check Below, which will open a new path in this room; from there, you can either leave the area (you can not return if you do), or explorer the rest of Connecting Bridge.


Voluptuous Vampire
Let's assume you opt not to leave the area just yet. Use a Trigger Point to examine the chest that spawned, and you'll get a Hell Scythe x15 from it, no traps. Go on to room three, and Lina will be excited about finding yet another chest; if you try to open it, you'll be struck at by an unseen enemy. Dodge it to avoid damage, and the enemies will reveal themselves (see the right).
Lastly, go on to the last part, where you'll reach the end of the bridge; you will find a large blue chest. If you check it in look mode using TP, the party will be surrounded by ghosts if you encourage Lina to open it. Lina will shoot at them, but it will not work; more will appear, and then suddenly the group is teleported to a dungeon within Lacrima Castle. See Castle Dungeon for details.
Castle Dungeon
Lacrima's Theme
The name of Lacrima Castle's theme is: Lacrima, the Black Evil Castle

Riviera OST (PSP) - Lacrima, the Black Evil Castle
PSP

Riviera OST (WSC) - Lacrima, the Black Evil Castle
WSC
